If you are seeing odd error messages from Excel, it may be helpful to run a repair install of Office. Please check with us if you have questions – send over the exact wording of the error message.
Running a repair install is a bit counter-intuitive since one does this via the “Add/Remove Programs” feature in Windows. Note that you are invoking a function to fix Office’s files. Reinstalling is an entirely different process. Here are step-by-step instructions for Windows 10.
Windows 10 #
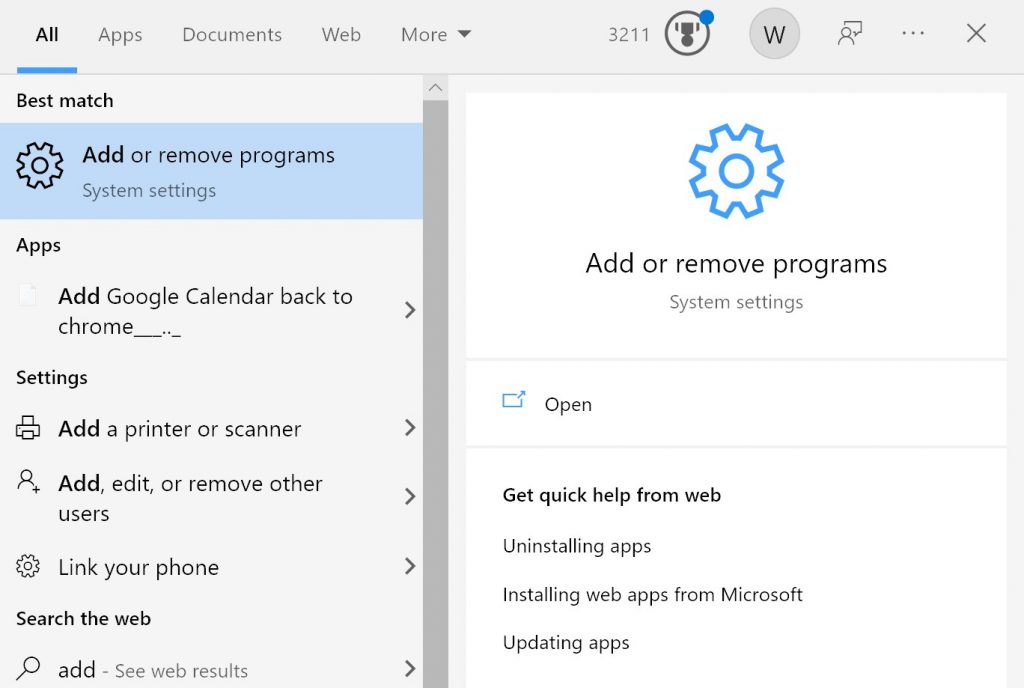
First, start typing “Add or Remove Programs” in the lower left corner of your screen:

A pop-up window appears – click on the blue-highlighted box marked, “Add or Remove Programs”
A new window opens. On the right side, scroll down through “Apps & Features” until you get to Microsoft Office. Click on the name of your Microsoft Office product as shown here:
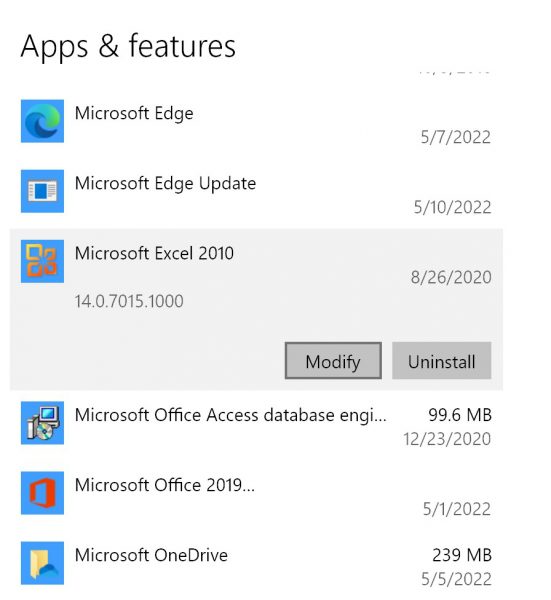
Click the “Modify” button. A pop-up window appears giving you two options:
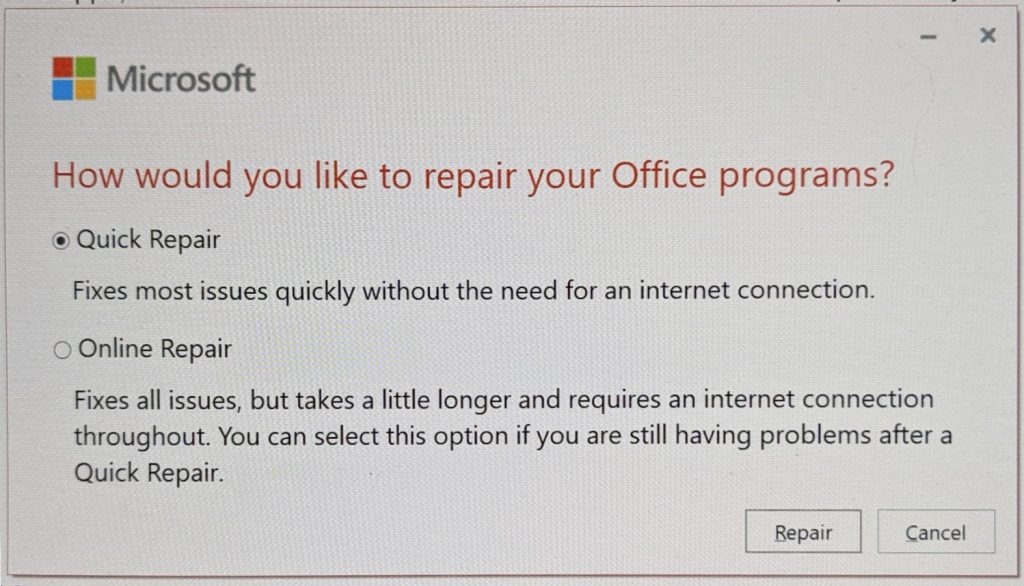
We recommend that you first try the “Quick Repair” option. Then re-open your RealData software. If you are still getting odd error messages, repeat the steps but use the “Online Repair” option.
Windows 11 #
The process for Windows 11 is similar but you will be presented with some slightly different options. First go to Apps & Features and select Microsoft Office or Microsoft 365. You may have more than one entry as shown below.
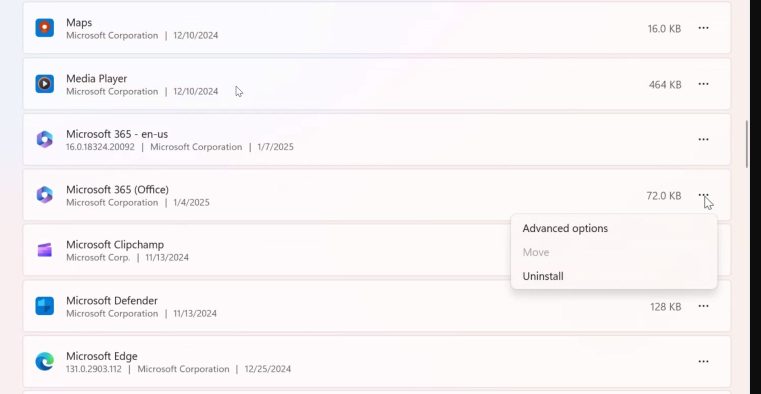
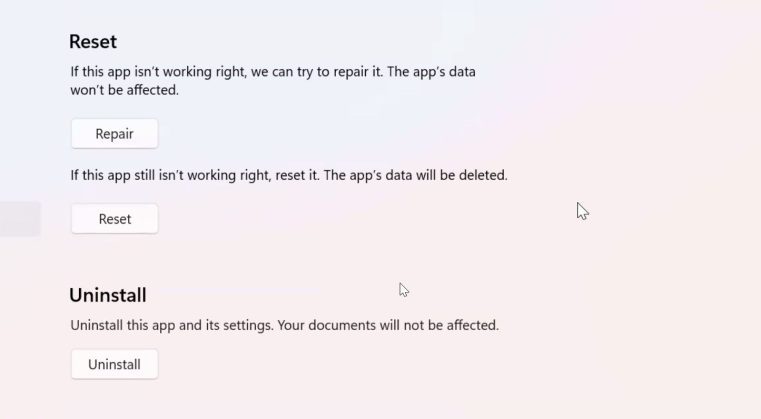
Click the three dots at the right and choose “Advanced Options.” In the Reset section, click the “Repair” button. You can also try the “Reset” option but be aware this will change any settings you have made. It will not, however, delete any Excel files you have created.