It is not uncommon to have more than one version of Microsoft Office / Excel on a computer. For example, the current release of Excel, as of this writing, is 2016. We still are recommending Excel 2011.
When you are using RealData’s products, there is a good chance you want to open the software in a specific version. There are two approaches to do this on the Mac. Assuming you want to use Excel 2011, those choices are:
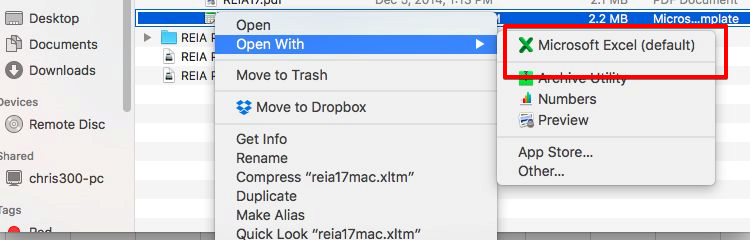
(1) The Select-As-You-Go or Temporary Method. #
Right click on the Excel file and choose “Open With” and then select Excel 2011 or Excel 14.x, or if you have a one-button mouse, tap the touchpad with two fingers to see the context menu for the file. You can also do this via the Finder menu: highlight the filename and then, in Finder, go to File > Open With > Excel 2011 or Excel 14.x Note: In the image below, if you have more than one version of Excel, both will appear in the red highlighted region. Select the appropriate version there.
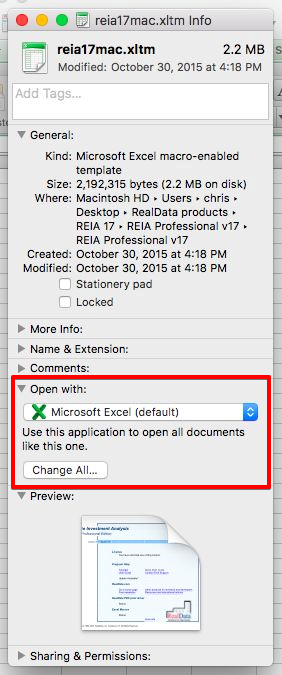
(2) The Persistent or “Set-it-and-Forget-it” Method #
Do this once and the choice remains until you change it again. Right click on a RealData Excel file and choose “Get Info” then from the menu, select “Open With” which is located about 2/3 the way down the menu. NOTE! This setting will stick around until you change it so all .xlsm and .xltm files are going to open with Excel 2011. You may still want to use Excel 2016 for other spreadsheets so consider this in your choice.